iT Factor logo iT Factor Self Tape Studio

Search The Help Center

Need another walkthrough?

Search the guide hub or jump into the setup and workflow topics that connect to project creation.

Getting Started · New Projects

Create a new project without filling in every detail today.

The New Project Wizard is where iT Factor turns an audition, self-tape, or role into an organized working project. Start with the title and role, keep the scene count in range, and add the rest as you have it.

You can open this flow from the empty-projects card or from Start New Session when you already have projects. This page shows what matters now, what can wait, and how each step helps later.

iT Factor home screen showing an active project and the Start New Session button

Quick Start

What you need right now, and what can wait.

This wizard is built to get you moving, not trap you in setup. If you want the fastest useful first pass, keep it simple and come back later for the extra detail.

What you need right now

  • Project title
  • Role name
  • A scene count between 1 and 10
  • The due date if casting already gave one

What you can skip for now

  • Representation
  • Casting office and casting director
  • Submitted headshot
  • Custom slate wording and extra notes
Step 1

Project Details

This step gives the project its name, timing, and overall shape before you move into materials and slate choices.

Required right now
  • Project title
  • Role name
Optional for now
  • Type and genre
  • Pay, union, and deal details
  • Submission due date, time zone, and shoot date
Used later in
  • Home screen project cards
  • Project detail screens
  • Review summary and schedule reference

What to focus on here

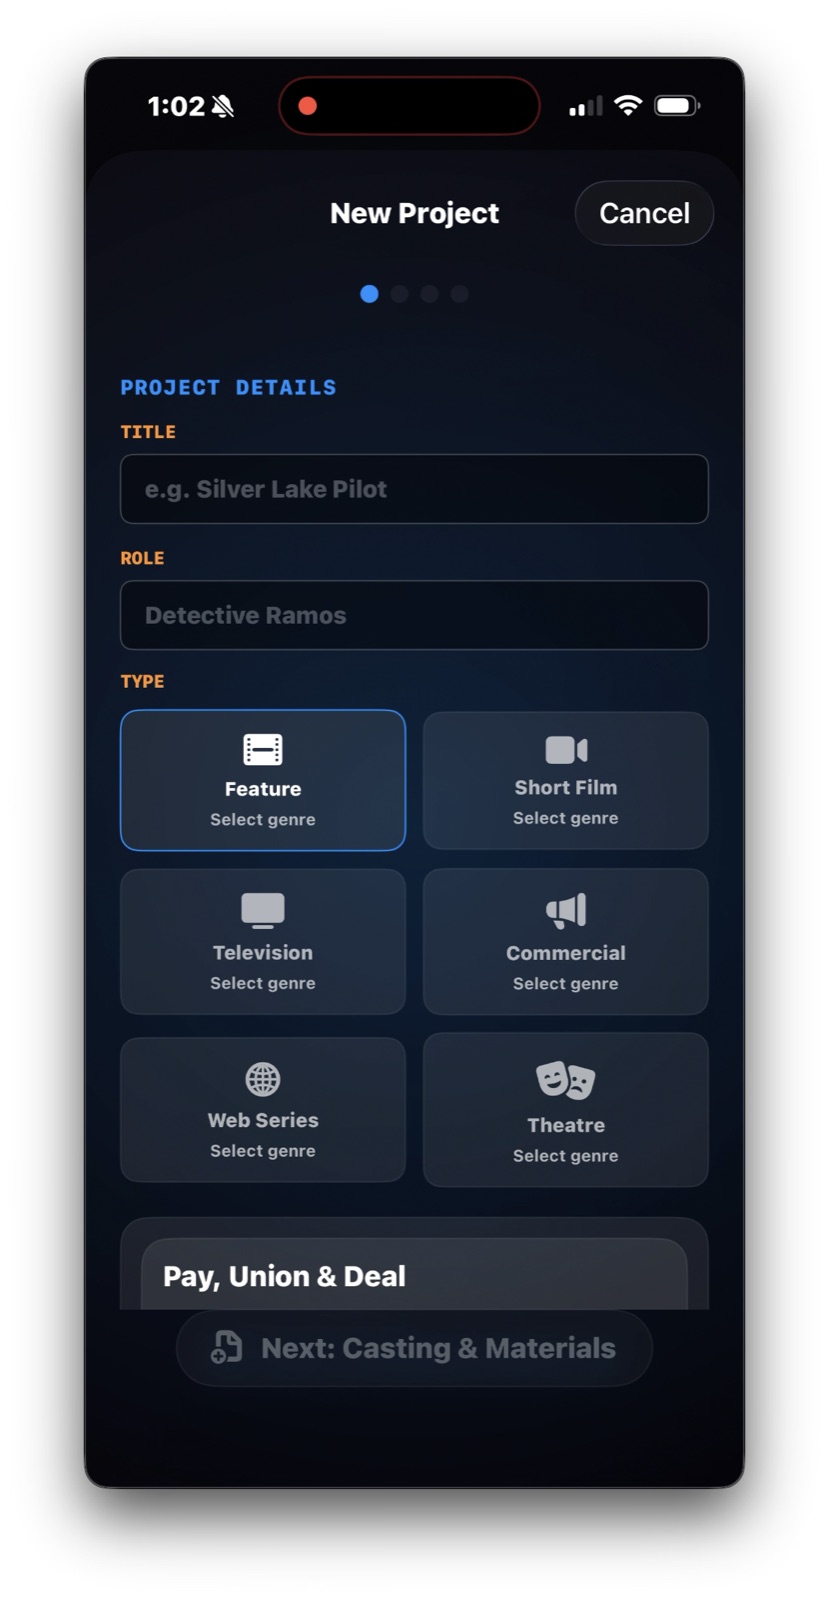
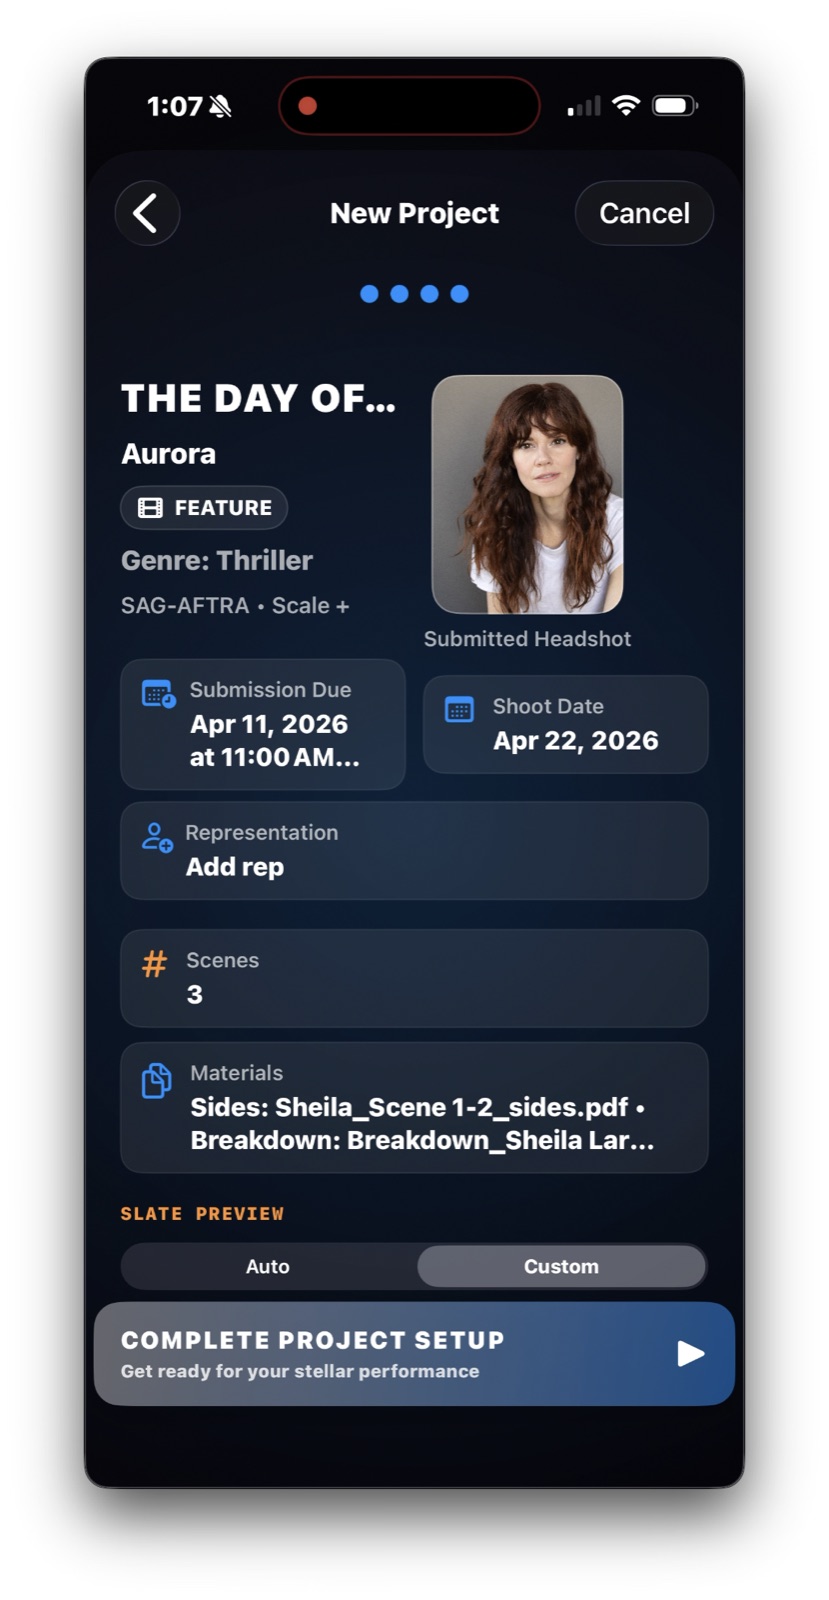
If you are in a hurry, title and role are the real must-haves. They are the two details that give the project a clean identity everywhere else in the app.

Type, genre, and pay details help keep things organized, but they do not have to be perfect on the first pass. Add what you know, then keep moving.

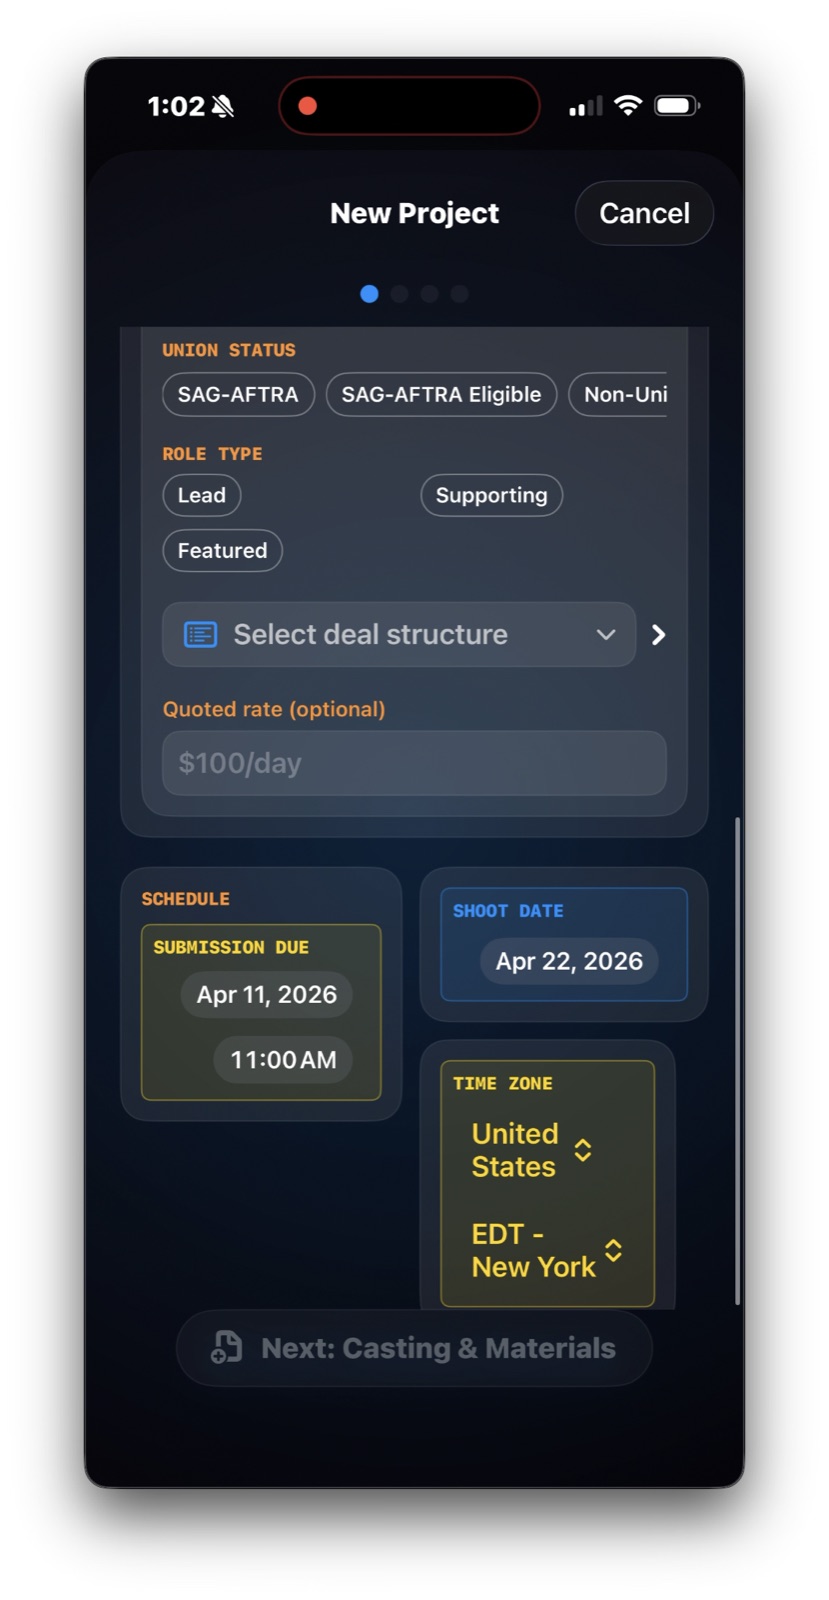
The due date is one of the most useful extras because it keeps the deadline easy to read later. If casting gave the cutoff in a different city or market, set the time zone so the saved time means what they meant.

iT Factor New Project Wizard showing title, role, and project type on the Project Details step
This first screen is where the project gets its name and role. If you fill in these basics, the wizard already has a strong starting point.
iT Factor New Project Wizard showing pay, submission due date, shoot date, and time zone on the same Project Details step
Lower on the same step, the date, time, and time zone help you keep the deadline clear instead of trying to remember it later.
Step 2

Casting & Materials

This is where the project gets the people, materials, and scene structure that support your session later.

Required right now
  • Keep the scene count between 1 and 10
  • Everything else here can wait if needed
Optional for now
  • Representation and submitted headshot
  • Casting office and casting director
  • Breakdown, notes, and sides
Used later in
  • Project summary and review screen
  • Materials reference during the session
  • Project-specific rep and headshot details

What to focus on here

Think of this step as the project’s working packet. If someone submitted you, pick the rep. If a specific headshot went out, save that one so the project reflects the real submission.

Add casting details if you have them, but do not let that slow you down. The biggest practical wins here are your materials and the scene count.

Breakdowns and sides stay attached to the project for reference later. Scene count sets the starting structure for the session, so keep it accurate and inside the 1 to 10 range.

iT Factor New Project Wizard showing representation, submitted headshot, casting details, and scenes on the Casting and Materials step
This screen holds the project-specific details that help you remember what was submitted and how many scenes you are working with.
iT Factor New Project Wizard showing the Breakdown sheet with options to import from files or photos and add notes
Materials can come from files or photos. If you have a breakdown now, attach it and add notes only if they would actually help you later.
Step 3

Slate Details

This step decides what your project slate says and how you want the on-camera intro framed.

Required right now
  • Nothing here is required to create the project
  • Keep it simple and match casting
Optional for now
  • Framing choices
  • Slate item chips
  • Passport, citizenship, and custom wording
Used later in
  • Slate preview and review screen
  • Prompt support during recording
  • Project-specific intro wording

What to focus on here

For most projects, start with Auto and only turn on the details casting actually asked for. A cleaner slate usually feels better on camera.

If location or local hire needs to read a certain way for this one project, adjust it here. That gives you project-specific wording without making the rest of your profile feel like homework.

Switch to Custom only when the suggested wording needs rewriting. If the default version already sounds right, you can leave it alone.

iT Factor New Project Wizard showing framing choices, selected slate items, and the start of the slate preview
The main slate screen lets you choose framing and turn the right intro details on without making the slate longer than it needs to be.
iT Factor New Project Wizard showing the Custom slate preview editor with save and reset options
Custom mode is there when you need your own wording. If Auto already reads cleanly, that is usually the easier path.
Step 4

Review Details

This final screen gives you one calm place to check the whole project before it is created.

Required right now
  • Review the summary once
  • Tap Complete Project Setup
Optional for now
  • Go back and adjust anything that feels off
Used later in
  • The new project card on Home
  • Your first self-tape session
  • Saved slate and materials references

What to focus on here

This is your final catch-anything screen. Use it to spot a wrong due date, the wrong headshot, missing materials, or slate wording that does not match the instructions.

Once this looks right, complete setup and let the app do the next part. You are not just saving a form here. You are creating the project and the first working session that goes with it.

iT Factor New Project Wizard review screen summarizing title, role, schedule, scenes, materials, and slate preview before completion
The review screen is where you make sure the project looks like the real audition before you create it and move into the working session.

Quick Help

A few setup details explained.

These are the parts of setup that tend to raise questions the first time through. Here’s what they mean in plain language.

Project title and role name

The project title is the job, audition, or production name. Role name is the part you are reading for. Those two are what the app needs most to keep the project organized.

Due date and time zone

Use the time zone casting meant when they gave the deadline. This helps the saved due time stay accurate instead of being off by a few hours.

Representation and submitted headshot

Only add a rep if someone actually submitted you, and only choose the headshot that was really used for this submission.

Breakdown and sides

These are your project materials. Add them from files or photos when you have them, so they stay attached to the project for reference later.

Scene count

Keep the scene count between 1 and 10. It sets the starting structure for the project, so it is worth getting right even if the rest of the step stays light.

Auto and Custom slate preview

Auto gives you a strong starting version. Custom is there when you need to rewrite the wording yourself. If Auto already sounds right, you do not need to do more.

FAQ

Quick answers before you move on.

Do I need to fill every screen completely?
No. The main must-have items are the project title and role name. The scene count also needs to stay between 1 and 10, but most of the rest can be added later.
What if I do not have representation?
That is completely fine. Representation is optional, so you can leave it blank and still create the project.
What if I do not have sides yet?
You can still move forward. Create the project first, then attach sides later when they arrive.
What if the slate preview looks wrong?
Start by checking Auto mode and turning slate items on or off. If you still need different wording, switch to Custom and edit it there.
What if I do not know the exact shoot date?
Leave it blank for now. Shoot date is helpful, but it is not required to create the project.

Related Guides

Keep going when you are ready.

The help center is built so you can move from setup into the next part of your workflow without losing the thread.

Previous Actor Profile Wizard

Set up the personal details that can support your project and slate later.

Next How to Slate for a Self Tape

Keep going with cleaner intro choices once the project itself is set up.

Download iT Factor

Turn the next audition into a project that feels organized from the start.

The New Project Wizard is there to reduce scramble, not add more of it. Start simple, then let the app hold the structure for you.