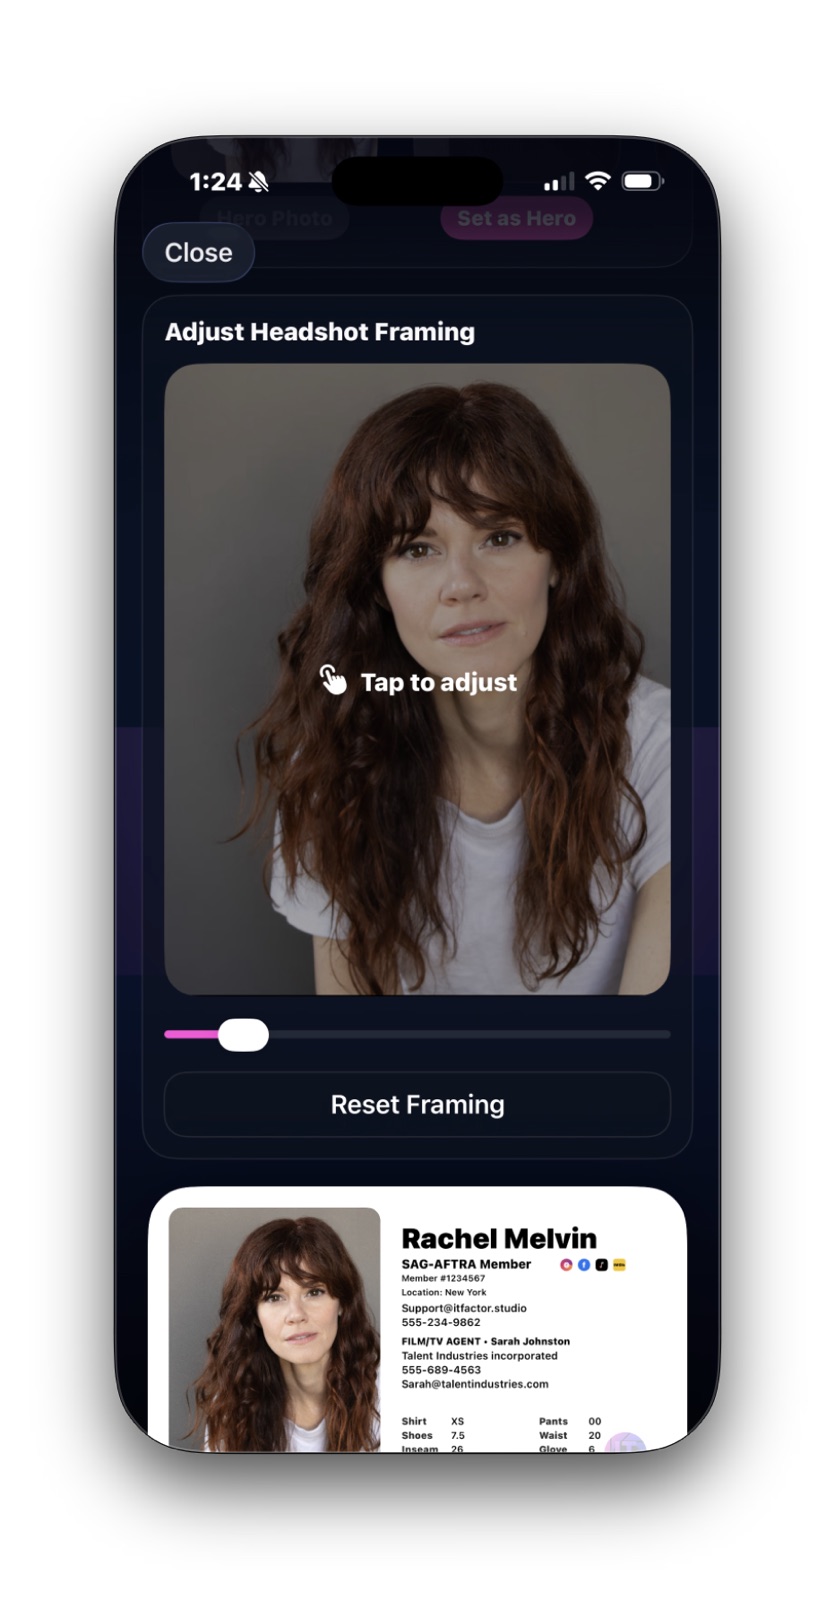
What to focus on here
Start by choosing the headshot that best matches how you want to present yourself professionally right now. Then use the framing controls to keep the crop balanced.
A card often needs a slightly different crop than your main profile image. That does not mean the photo is wrong. It just means the card needs its own cleaner framing.